Unique Graduation Cake Designs
Highlighted under: Sweet Shop | Homemade Candy
I love celebrating milestones, and graduations hold a special place in my heart. Creating a cake that reflects the achievement is equally important to me. That's why I take pride in crafting unique graduation cake designs that not only taste delicious but also look stunning. From incorporating school colors to adding personal touches, each cake becomes a masterpiece. I am excited to share some creative ideas that will help you design the perfect cake for your graduation celebration!
When I first attempted to create a graduation cake, I was determined to make something different. I experimented with fondant and edible images, which opened a whole new realm of design possibilities. The method I discovered allows for intricate details without compromising the structure of the cake. It’s gratifying to see the joy on graduates' faces when they see something so personalized!
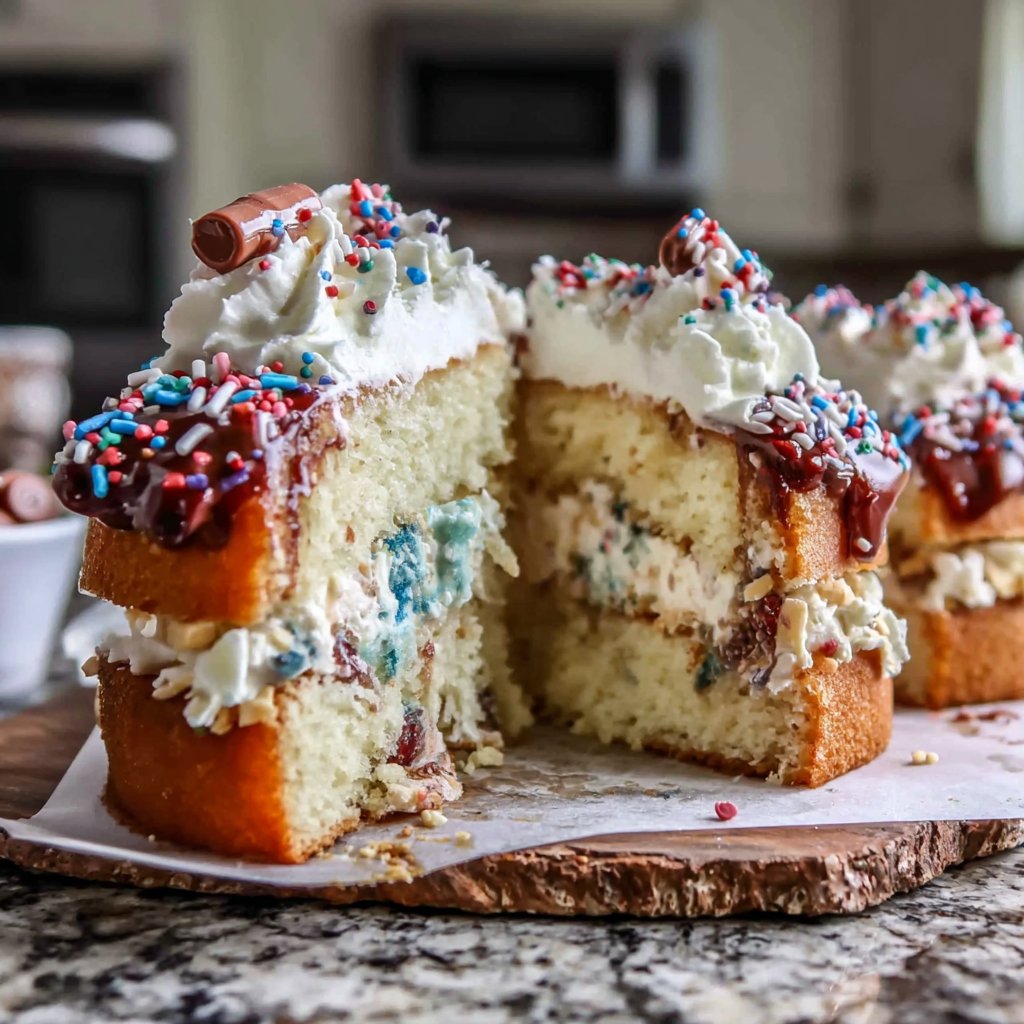
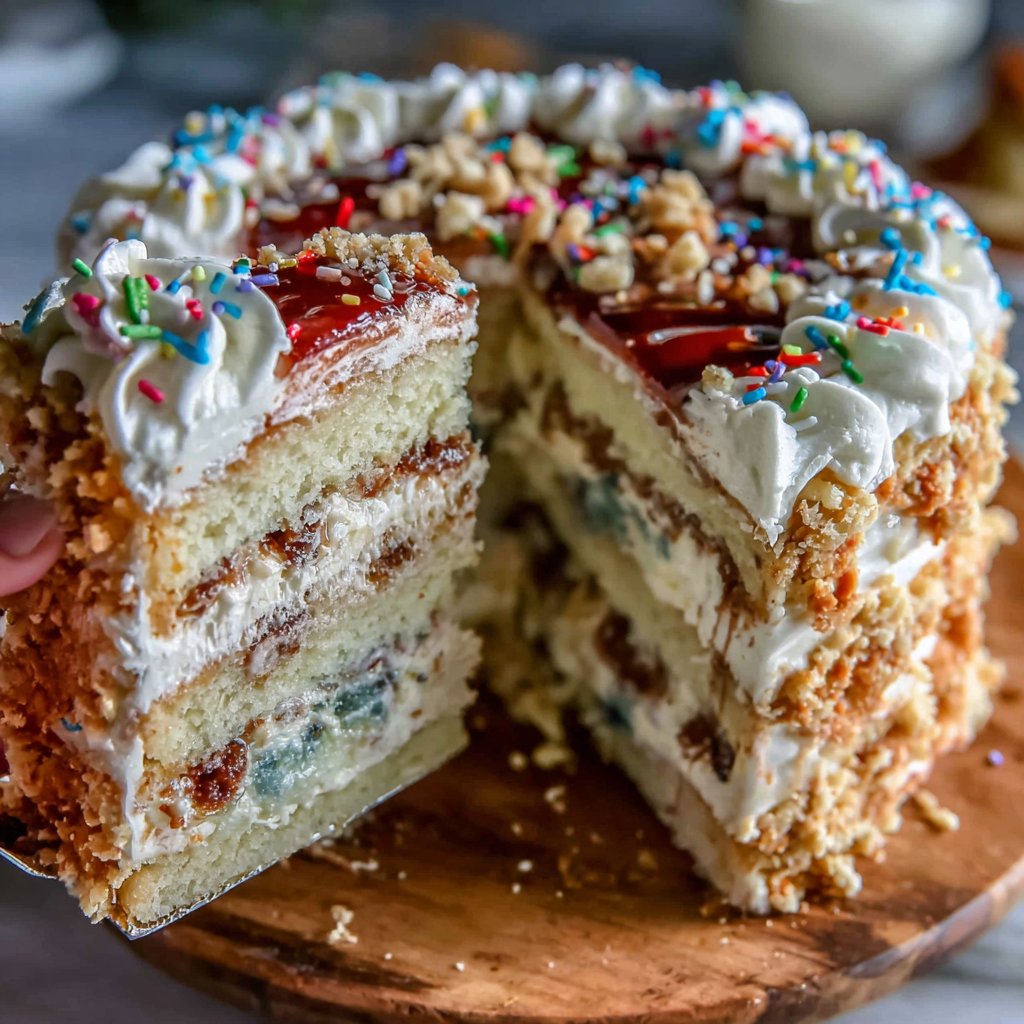
One unique idea that worked wonders for me was using themed cake toppers along with color-coordinated layers. This layering technique not only adds dimension but also offers the surprise of different flavors in each slice. When guests see the vibrant colors, they can't help but feel the excitement of the occasion!
Why You'll Love These Graduation Cakes
- Creative designs that reflect personal achievements
- Delicious flavors paired with stunning visuals
- Perfect for commemorating a special milestone
Crafting Your Graduation Cake Layers
When baking your graduation cake, the quality of your cake layers can make a significant difference. Using fresh ingredients is essential; for instance, make sure your butter is at room temperature to incorporate air efficiently, resulting in a lighter texture. Additionally, sift the flour before measuring to avoid overpacking and ensure a tender crumb. Keep a close eye on the baking time; ovens can vary, so start checking for doneness at 25 minutes. Look for a golden top and a toothpick that comes out clean to guarantee moist layers.
Another technique to elevate your cake layers is to infuse them with flavor. Adding a citrus zest or a splash of flavored extract like almond can enhance the taste profile remarkably. If you're aiming for more complexity, consider adding a tablespoon of cocoa powder to make a delightful chocolate variation. Just be cautious about the ratios so that the balance of dry to wet ingredients remains optimal, maintaining your cake's structure.
Frosting Fun and Fondant Finishing
To achieve a smooth and creamy frosting, it's crucial to beat your butter thoroughly until it's whipped and pale, which should take about 3 to 5 minutes. This will ensure that the frosting spreads easily and sets well on the cake. For a more stable frosting suitable for decoration, you may consider incorporating a bit of meringue powder into the frosting mixture, adding to its structure and helping it hold up beautifully against warmer temperatures.
Fondant can be intimidating, but with practice, it can add a polished look to your cake. When rolling out fondant, dust your workspace with cornstarch or powdered sugar to prevent sticking. Aim for a thickness of about 1/8 inch, as this creates a more substantial coating that will hold its shape without cracking. If you need to color your fondant, knead in gel colorants gradually until you reach your desired shade, ensuring even coloring throughout.
Ingredients
Basic Cake Ingredients
- 2 cups all-purpose flour
- 1 1/2 cups granulated sugar
- 1/2 cup unsalted butter, softened
- 1 cup milk
- 3 1/2 teaspoons baking powder
- 1 teaspoon vanilla extract
- 1/2 teaspoon salt
- 3 large eggs
For Frosting and Decorations
- 4 cups powdered sugar
- 1 cup unsalted butter, softened
- 1/4 cup heavy cream
- 3 cups fondant
- Various color gels for coloring
- Edible decorations (toppers, sprinkles)
Instructions
Steps
Prepare the Cake Layers
Preheat your oven to 350°F (175°C). In a mixing bowl, cream the softened butter and sugar together until light and fluffy. Gradually add the eggs while mixing. In another bowl, combine the flour, baking powder, and salt. Alternately add the dry ingredients and milk to the butter mixture. Pour into greased cake pans and bake for 25-30 minutes or until a toothpick inserted comes out clean.
Make the Frosting
In a large bowl, beat the softened butter until creamy. Gradually add the powdered sugar, followed by the heavy cream and vanilla extract. Beat until light and fluffy. If needed, adjust the consistency with more cream or powdered sugar.
Decorate the Cake
Once the cake layers are completely cool, level them with a serrated knife. Place one layer on a cake stand and spread a layer of frosting on top. Repeat with remaining layers. Coat the entire cake with a thin layer of frosting (crumb coat), then chill in the refrigerator for 15 minutes. Finally, cover with a final layer of frosting and decorate with fondant and themed toppers.
Final Touches
Pro Tips
- For a unique touch, consider adding edible images that celebrate the graduate's achievements or interests around the cake. Additionally, experimenting with different flavors for each layer can make each slice a delightful surprise.
Storing and Serving Your Graduation Cake
Once your cake is decorated and ready to shine at your graduation celebration, it's important to know how to store it properly. If you're preparing the cake in advance, you can refrigerate it for up to three days in an airtight container, ensuring it stays fresh. Just be cautious with fondant-covered cakes, as refrigeration can sometimes cause condensation, which may soften the fondant’s texture. If serving the same day, keep the cake at room temperature until it’s time to slice.
When it's time for serving, a well-chilled cake can produce cleaner slices, especially if you're using fondant. Use a serrated knife dipped in warm water to cut through the layers smoothly without tearing the cake. Consider pairing slices with fresh fruit or a scoop of ice cream to enhance the flavor. This not only adds a refreshing element but also complements the rich buttercream and fondant sweetness.
Personalizing Your Graduation Cake
To make your graduation cake truly personal, think about incorporating elements that tell your unique story. You could use edible images printed with food-safe ink that capture significant moments from your school journey. Additionally, consider adding decorations that represent your field of study, such as fondant books for a literature major or a mortarboard for the graduating student. These touches create not just a cake, but a stunning conversation piece that celebrates your accomplishments.
Also, don't shy away from different flavor combinations. Instead of a standard vanilla layer, try a rich lemon cake paired with raspberry filling for a fresh twist. You can also explore gluten-free flour or dairy-free substitutes to accommodate friends and family with dietary restrictions. By being creative with both flavors and design, your graduation cake can be a fantastic reflection of your own taste and achievements.
Questions About Recipes
→ Can I use other flavors for the cake?
Absolutely! Chocolate, red velvet, or even a fruit-flavored cake can be used based on preference.
→ How do I store the cake after decorating?
Keep the decorated cake in a cool place, ideally in the fridge, wrapped gently to avoid smudging the decorations.
→ What can I use as a gluten-free alternative?
You can substitute regular flour with a gluten-free blend, ensuring that the rest of your ingredients are gluten-free as well.
→ How far in advance can I make the cake?
You can bake the cake layers up to three days ahead and freeze them. Just make sure they are wrapped well to prevent freezer burn.
Unique Graduation Cake Designs
Created by: The Chefwaynebakes Team
Recipe Type: Sweet Shop | Homemade Candy
Skill Level: Intermediate
Final Quantity: 12.0
What You'll Need
Basic Cake Ingredients
- 2 cups all-purpose flour
- 1 1/2 cups granulated sugar
- 1/2 cup unsalted butter, softened
- 1 cup milk
- 3 1/2 teaspoons baking powder
- 1 teaspoon vanilla extract
- 1/2 teaspoon salt
- 3 large eggs
For Frosting and Decorations
- 4 cups powdered sugar
- 1 cup unsalted butter, softened
- 1/4 cup heavy cream
- 3 cups fondant
- Various color gels for coloring
- Edible decorations (toppers, sprinkles)
How-To Steps
Preheat your oven to 350°F (175°C). In a mixing bowl, cream the softened butter and sugar together until light and fluffy. Gradually add the eggs while mixing. In another bowl, combine the flour, baking powder, and salt. Alternately add the dry ingredients and milk to the butter mixture. Pour into greased cake pans and bake for 25-30 minutes or until a toothpick inserted comes out clean.
In a large bowl, beat the softened butter until creamy. Gradually add the powdered sugar, followed by the heavy cream and vanilla extract. Beat until light and fluffy. If needed, adjust the consistency with more cream or powdered sugar.
Once the cake layers are completely cool, level them with a serrated knife. Place one layer on a cake stand and spread a layer of frosting on top. Repeat with remaining layers. Coat the entire cake with a thin layer of frosting (crumb coat), then chill in the refrigerator for 15 minutes. Finally, cover with a final layer of frosting and decorate with fondant and themed toppers.
Extra Tips
- For a unique touch, consider adding edible images that celebrate the graduate's achievements or interests around the cake. Additionally, experimenting with different flavors for each layer can make each slice a delightful surprise.
Nutritional Breakdown (Per Serving)
- Calories: 400 kcal
- Total Fat: 20g
- Saturated Fat: 10g
- Cholesterol: 75mg
- Sodium: 180mg
- Total Carbohydrates: 54g
- Dietary Fiber: 2g
- Sugars: 35g
- Protein: 3g